How to Use Image Tags
Administrators can add tags to images in the Image Library.
Tagging images provides two functions:
- Allows users to easily find the images they need in the Image Library
- Filters what images are displayed for specific templates and template variants
This feature is available for users with the Administrator role.
In this article
How to Add Tags
To add tags to an image:
- Click on the User Options menu in the top right of the Radiate screen and select Manage Images from the dropdown menu.
-
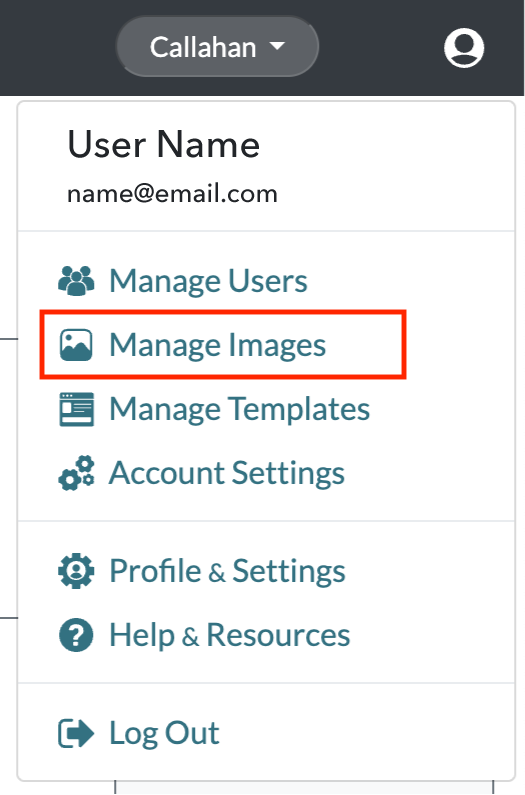
User Options Menu - Manage Images
-
- From the Manage Image Library window, search for the image you want to add or edit tags for.
-
- Under Tags, click into the box to select from existing tags. You can also type in a new tag and press Enter or click Add.
-

Manage Images - Add Tags
-
- Once your edits are complete, click the Save button.


Tagging Best Practices
- Add an underscore "_" at the beginning of a tag to specify image location or template type.
- Specify image location: Use tags such as "_header" or "_body" to determine a particular image slot the image is eligible for. This is particularly useful when editable image slots in a template have a specific size requirement. Note that you must work with your account manager to ensure that the template HTML includes the location-specific tag where required.
- Specify template: Use tags such as "_general" or "_operational" to determine which template the image should be eligible for. Note that you must work with your account manager to ensure that the template HTML includes the template-specific tag where required.
- Make sure to think through the templates users may want the images to show up for and the ways users might search for the images. Generally, more tags are better.
Tag Display Preferences
Tags are displayed over images in the image library by default.
For your account, you can decide if you want tags to be displayed or not by default. Reach out to your account manager to adjust this account setting.
Regardless of the account default, users can choose to display or hide image tags in the Image Library by clicking the Show Tags checkbox.

|

|
Overriding Default Tags for Template Variant
You can override default tags associated with an image slot in any of your template variants. This is very useful if you want to add more tags to provide a more limited selection of images for a specific variant.
- Click on the User Options menu in the top right of the Radiate screen and select Manage Templates from the dropdown menu.
-
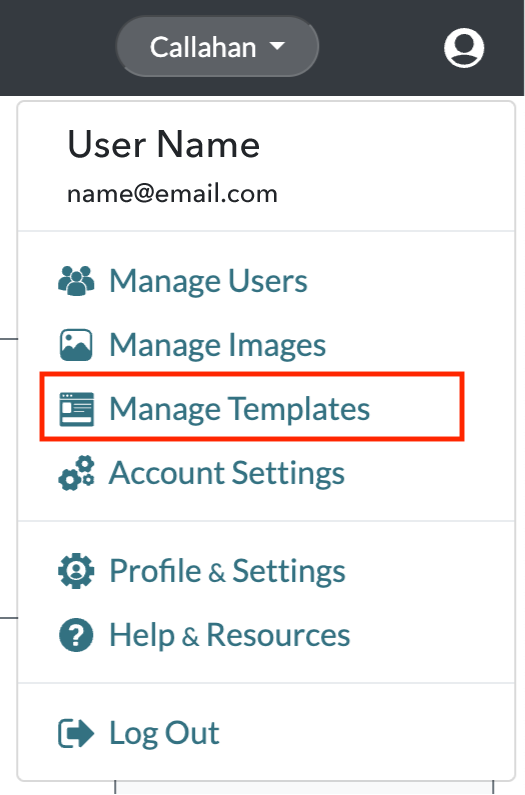
User Options Menu - Manage Templates
-
- On the Manage Templates page, click on the template variant that you would like to edit image tags for.
-
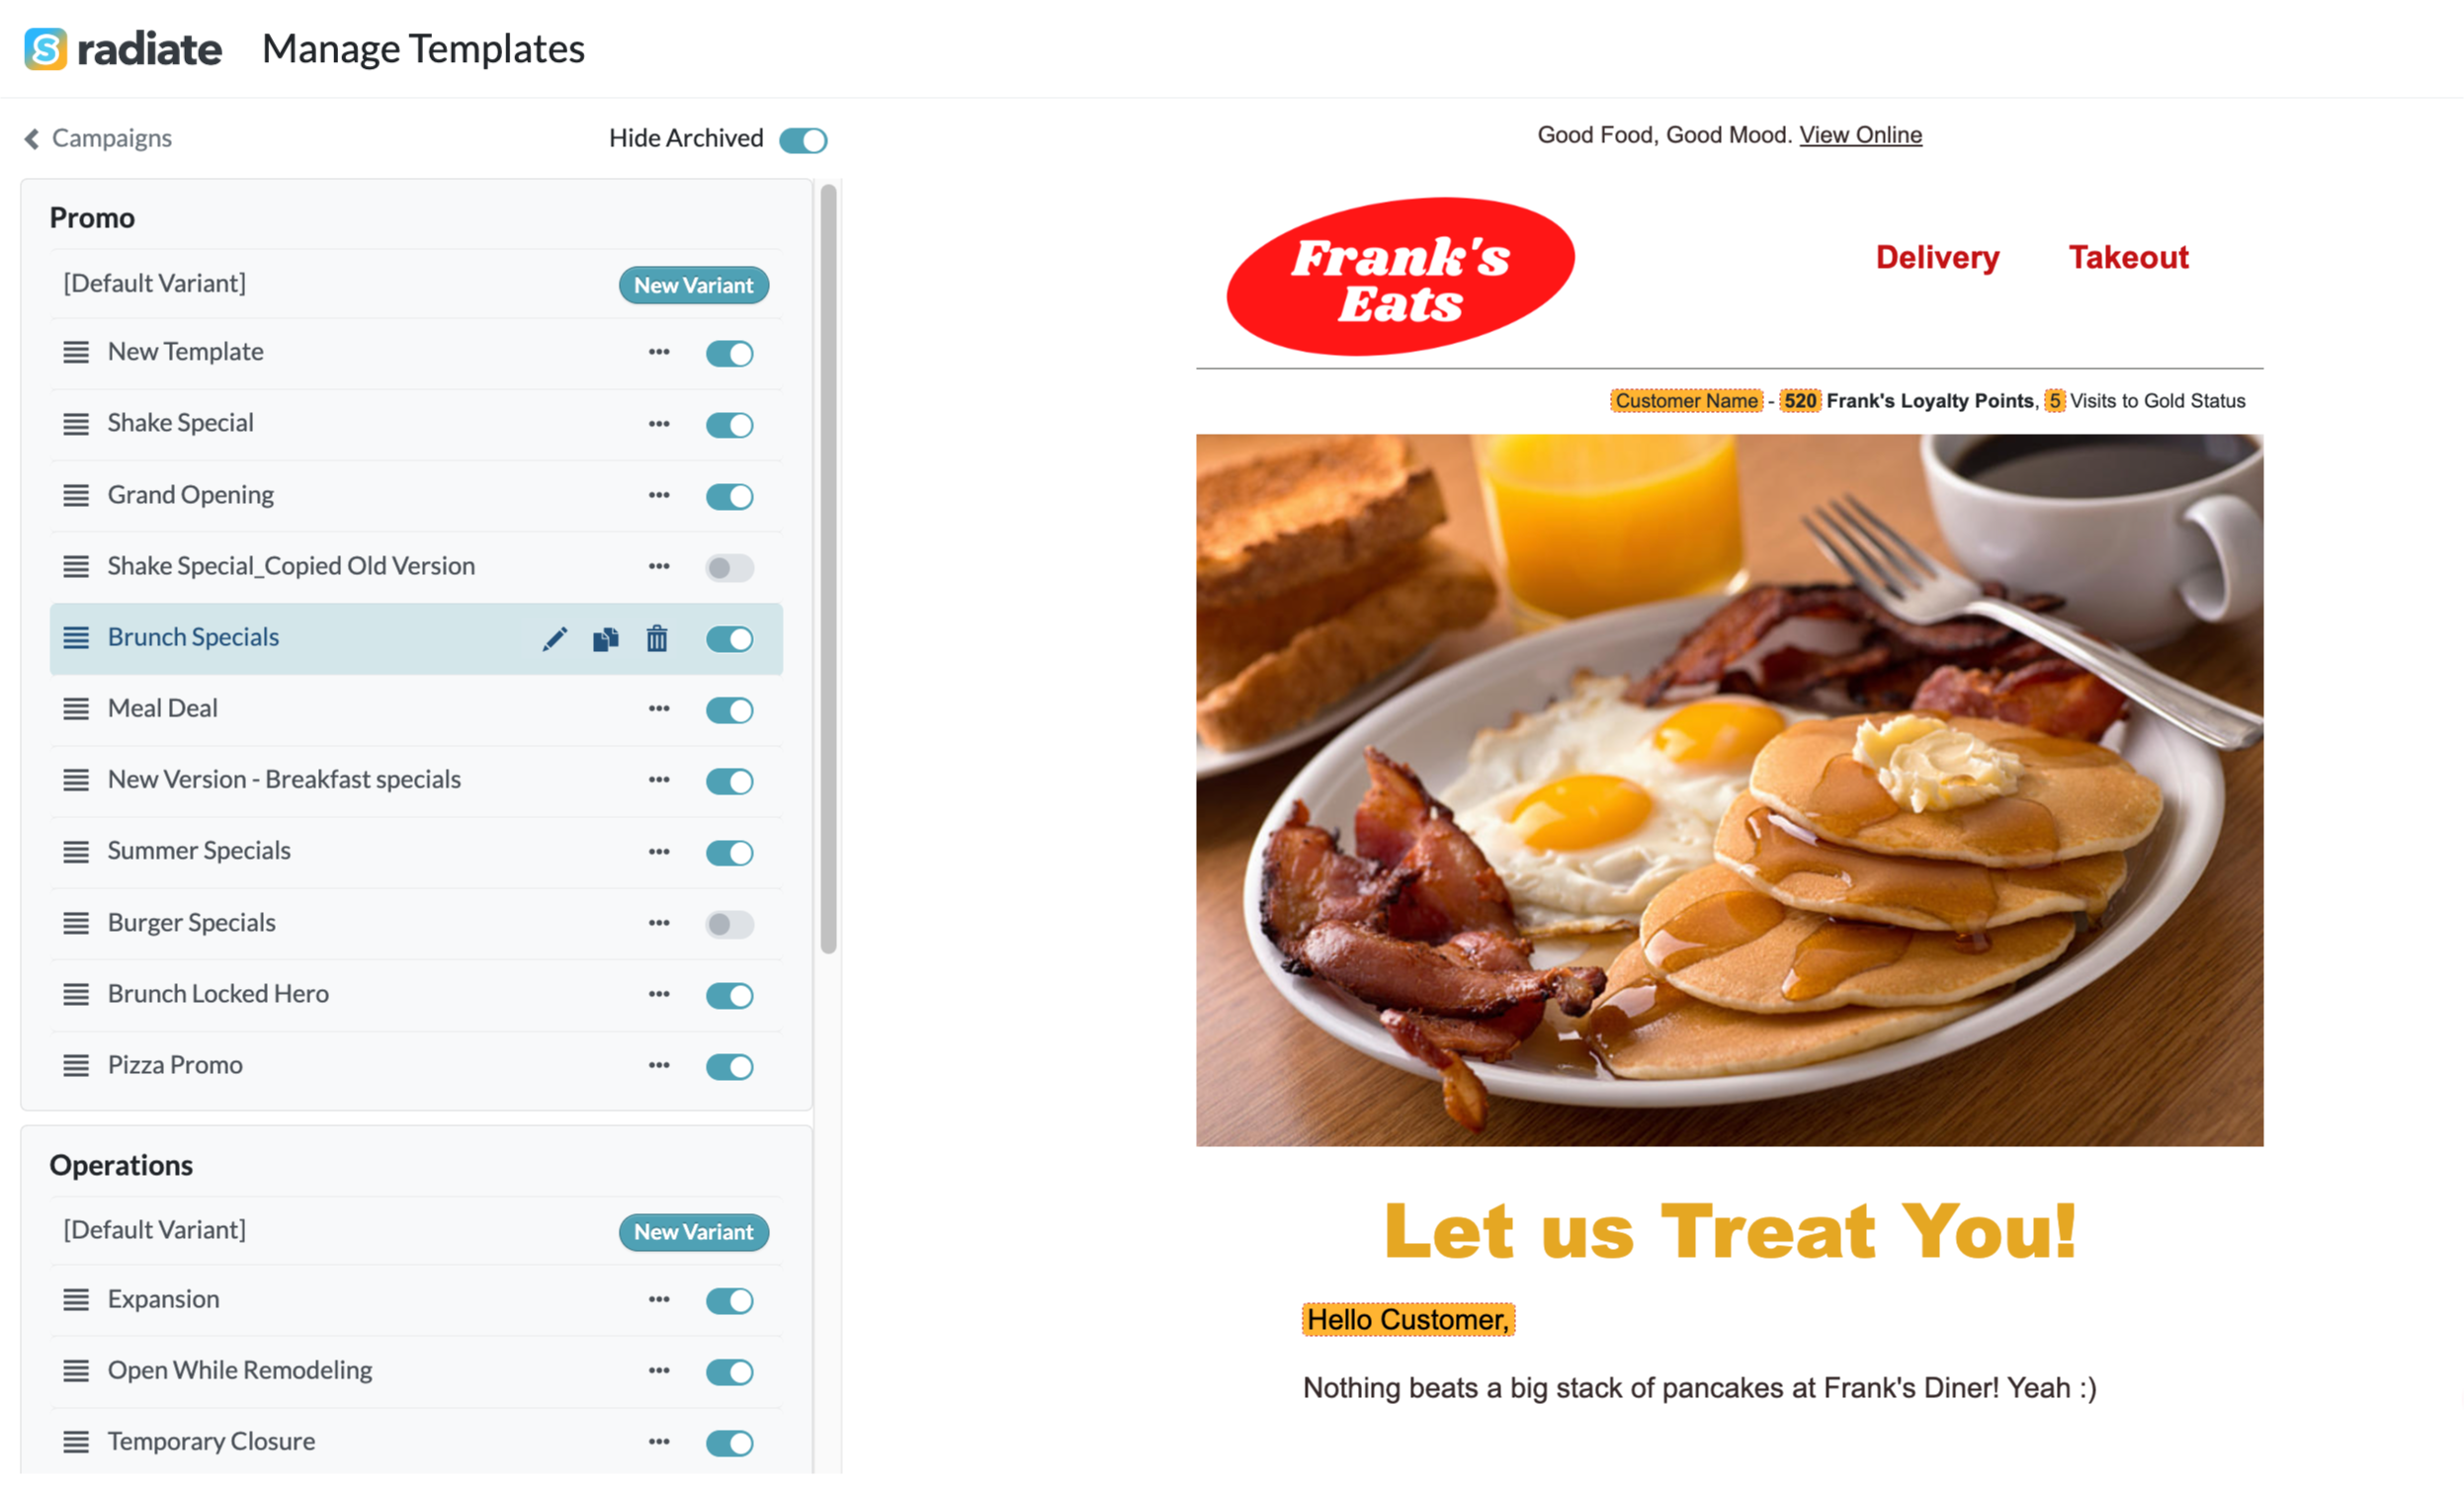
Manage Templates
-
- Each editable image section will have the option to Limit to Specific Tags. Enable this option to edit the image tags for that image slot.
-

Manage Templates - Limit Image Tags
-
- Add more image tags to further limit which images are available for users to select.
- Remove any tags you don't want associated with this template variant.
- Once your edits are complete, click the Save button.


