Creating a Jumpstart Campaign
Approvers can create Jumpstart Campaigns on behalf of groups and locations, making it easier for owners and managers to edit and launch campaigns.
Jumpstart Campaigns are an excellent way to increase adoption by giving users a campaign that's ready-to-go. They are also ideal for national campaigns, seasonal initiatives, and product launches where you want to give local teams the ability to customize messaging.
This feature is available for users with the Multi-Group Campaign Manager, Approver, and Administrator role.
Creating a Jumpstart Campaign
- Follow the usual process to create a new campaign. This will be the basis for your Jumpstart Campaign.
- In the Campaigns Overview page, find the campaign you just created. Click on the icon with three vertical dots. Select Use as Jumpstart...
-

Campaign Overview -
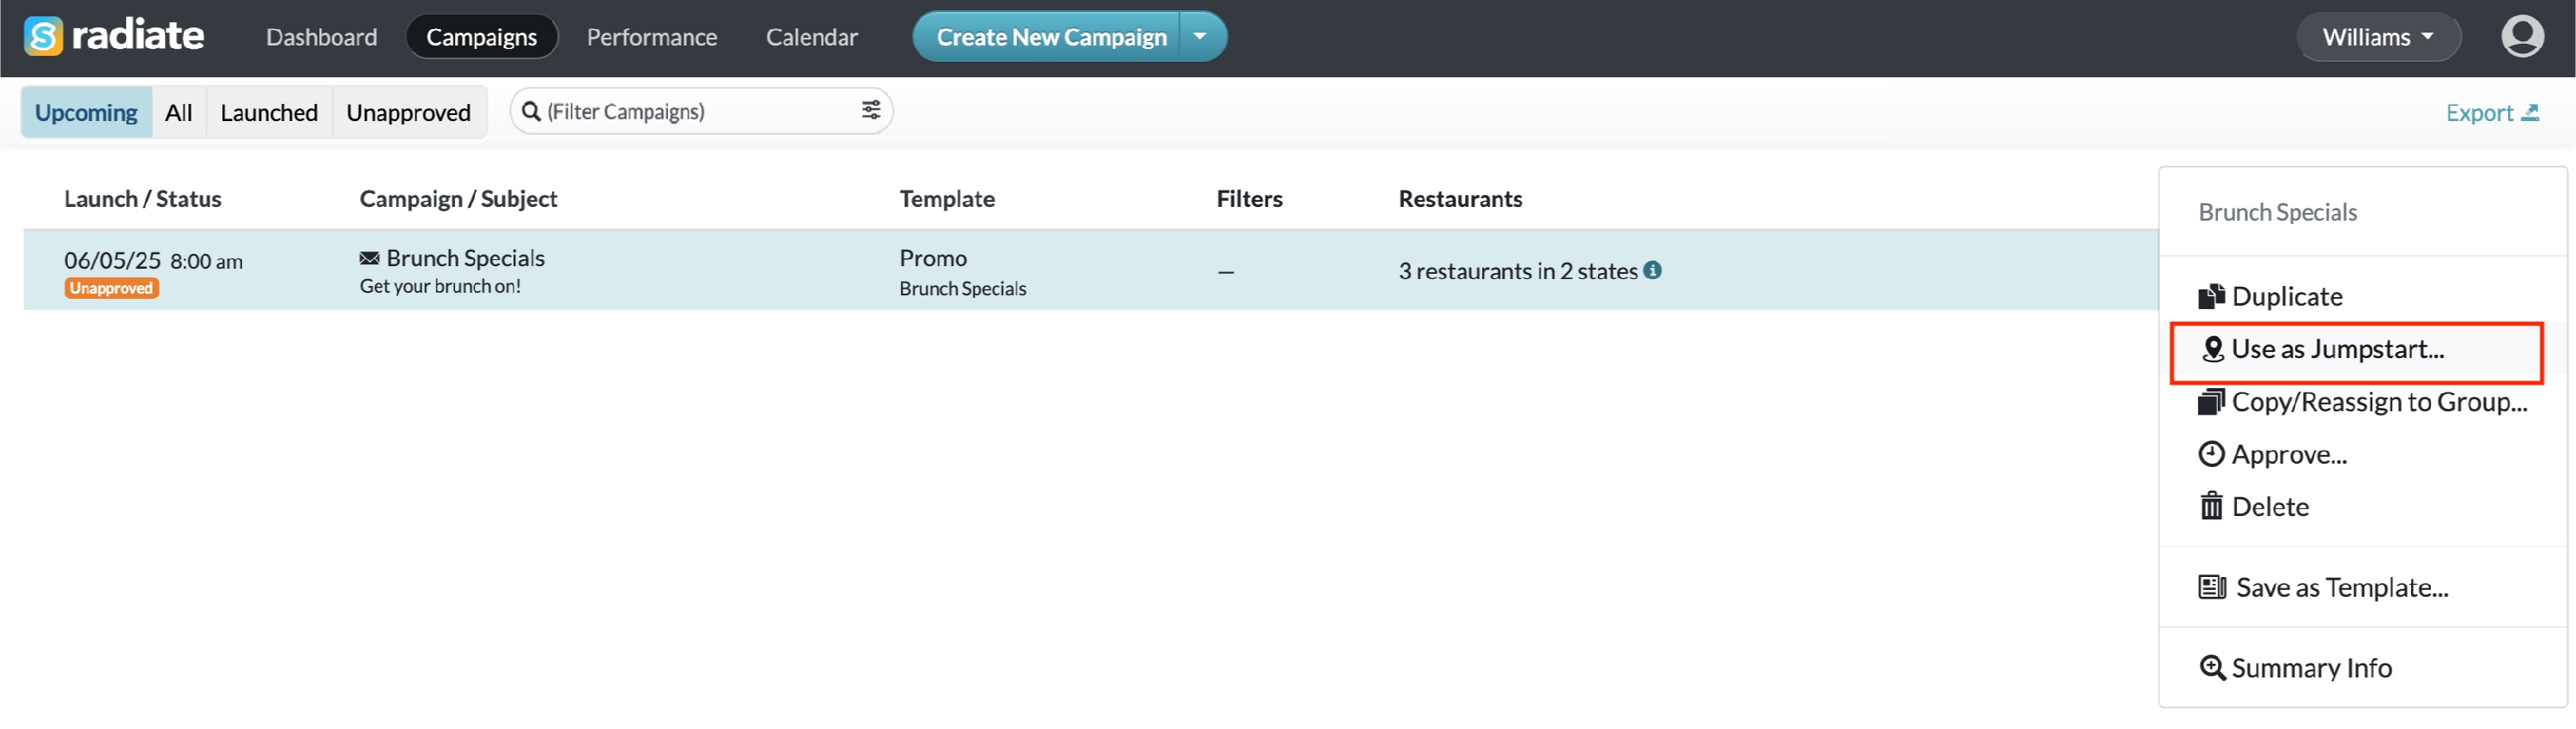
Campaign Overview - Use as Jumpstart
-
- In the Create a Jumpstart Campaign window, choose settings for which locations to include and campaign setup.
-
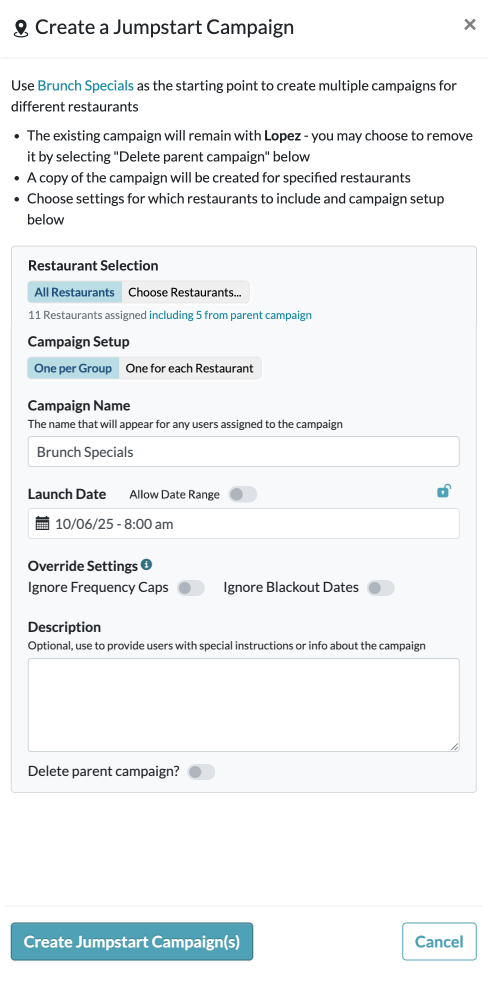
Jumpstart Campaign - Location Selection - Create the Jumpstart Campaign for All Locations or open the Choose Locations window to select specific locations.
-

Choose Locations Window
-
- Campaign Setup - Create campaigns One per Group or One for each Location.
- One per Group: Creates one copy of the campaign for each Group. Each campaign is tied to all Locations in the Group
- One for each Location: Creates one copy of the campaign for each Location. If your Group has 5 Locations, there will be 5 copies of the campaign created, with each one tied to a distinct location.
- Campaign Name - You can update the name that will appear for any users assigned to the campaign.
- Launch Date - Select the launch date or date range for the Jumpstart Campaign.
- Choose one launch date. If unlocked, users can change this date. If locked, users cannot change the date from the one you selected.
-
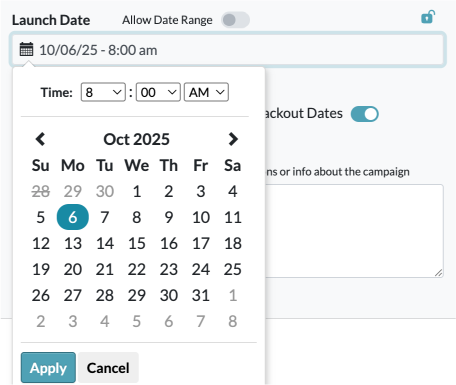
Choose Launch Date -
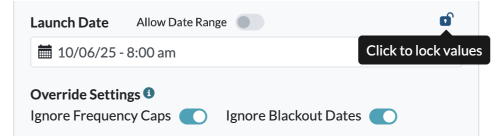
Lock Launch Date
-
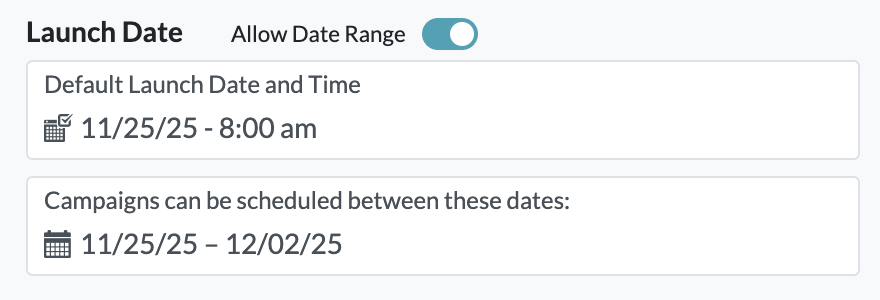
- You can also allow a date range.
- Choose a default launch date and time. Then, define the allowed date range for scheduling. This gives users the flexibility to pick a different send date within your selected range.
-
Allow Date Range
- Choose one launch date. If unlocked, users can change this date. If locked, users cannot change the date from the one you selected.
- Override Settings - Optionally, allow for overriding frequency caps and/or blackout dates when scheduling campaigns created from this Jumpstart Campaign
- Description - Optionally, provide users with special instructions or information about the campaign.
-

Jumpstart Campaign Description
-
- Delete parent campaign - Optionally, you can choose to delete the original parent campaign. This helps keep the Campaigns page clean and organized if you do not intend for the parent campaign to be actually sent out.
-

Jumpstart Campaign - Delete Parent Campaign
-
- Additional Information
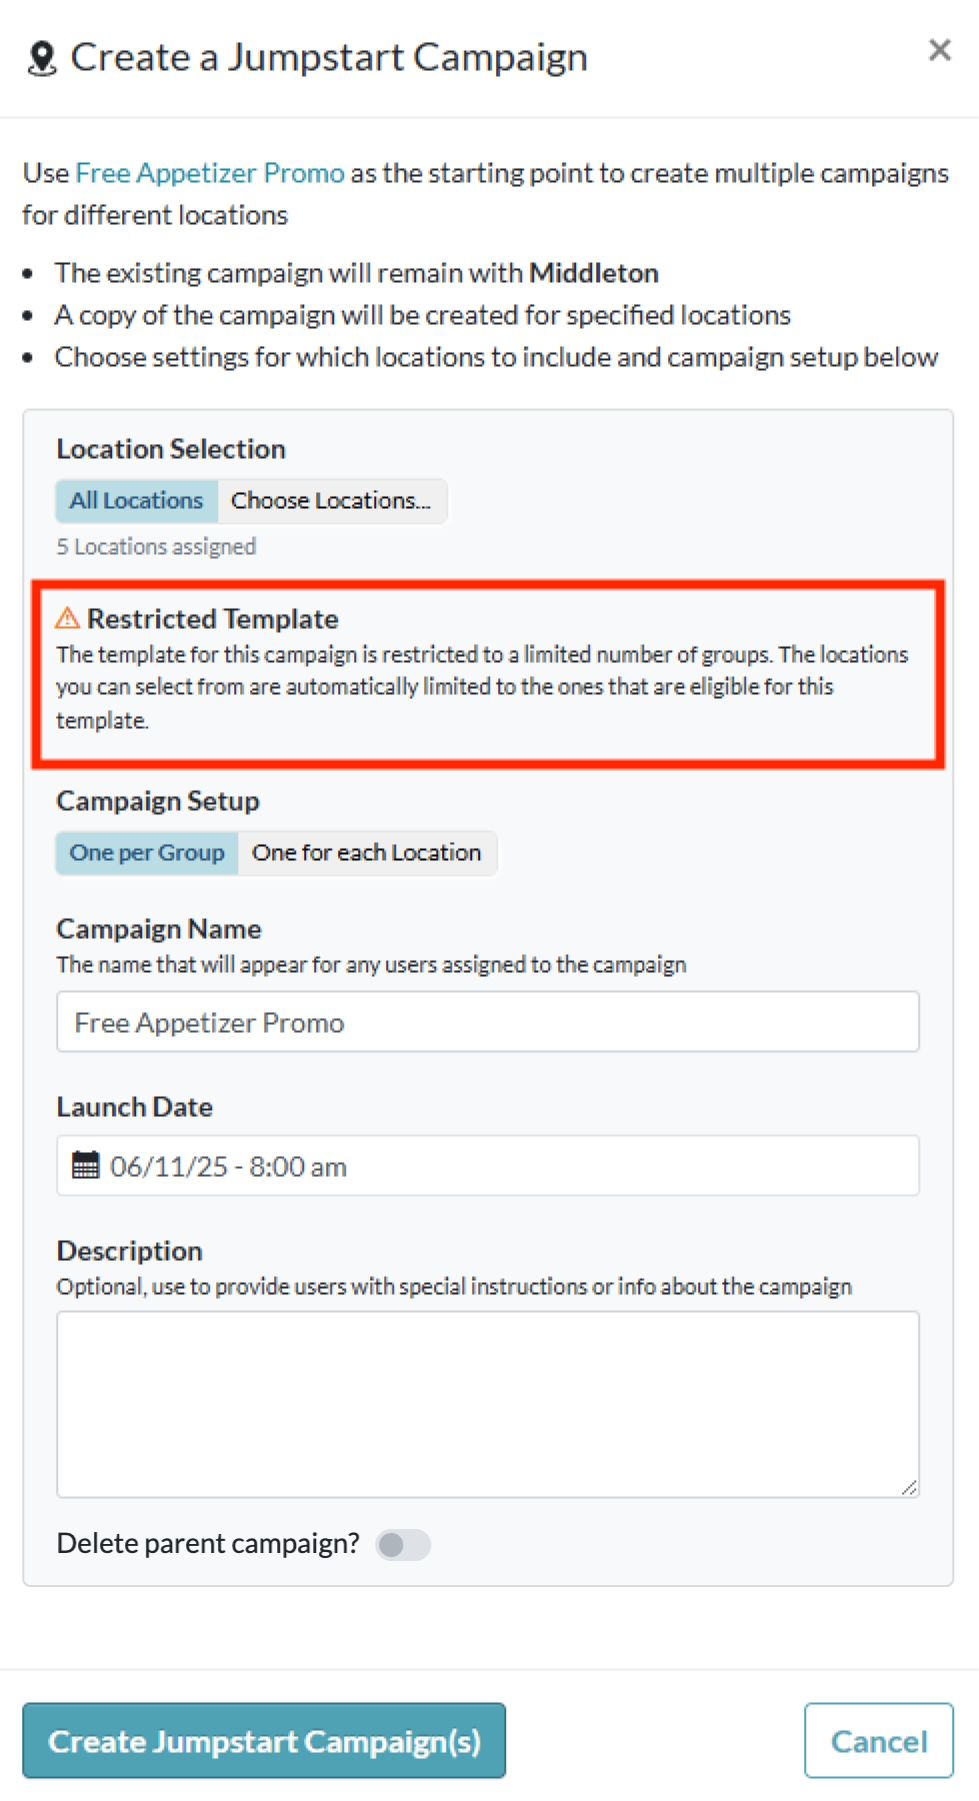
- Restricted templates:
- If the template the campaign you created is restricted to a limited number of groups, the locations you can select from are automatically limited to the ones that are eligible for the template. You can also choose locations from within these eligible groups.
-
Jumpstart Campaign - Restricted Template
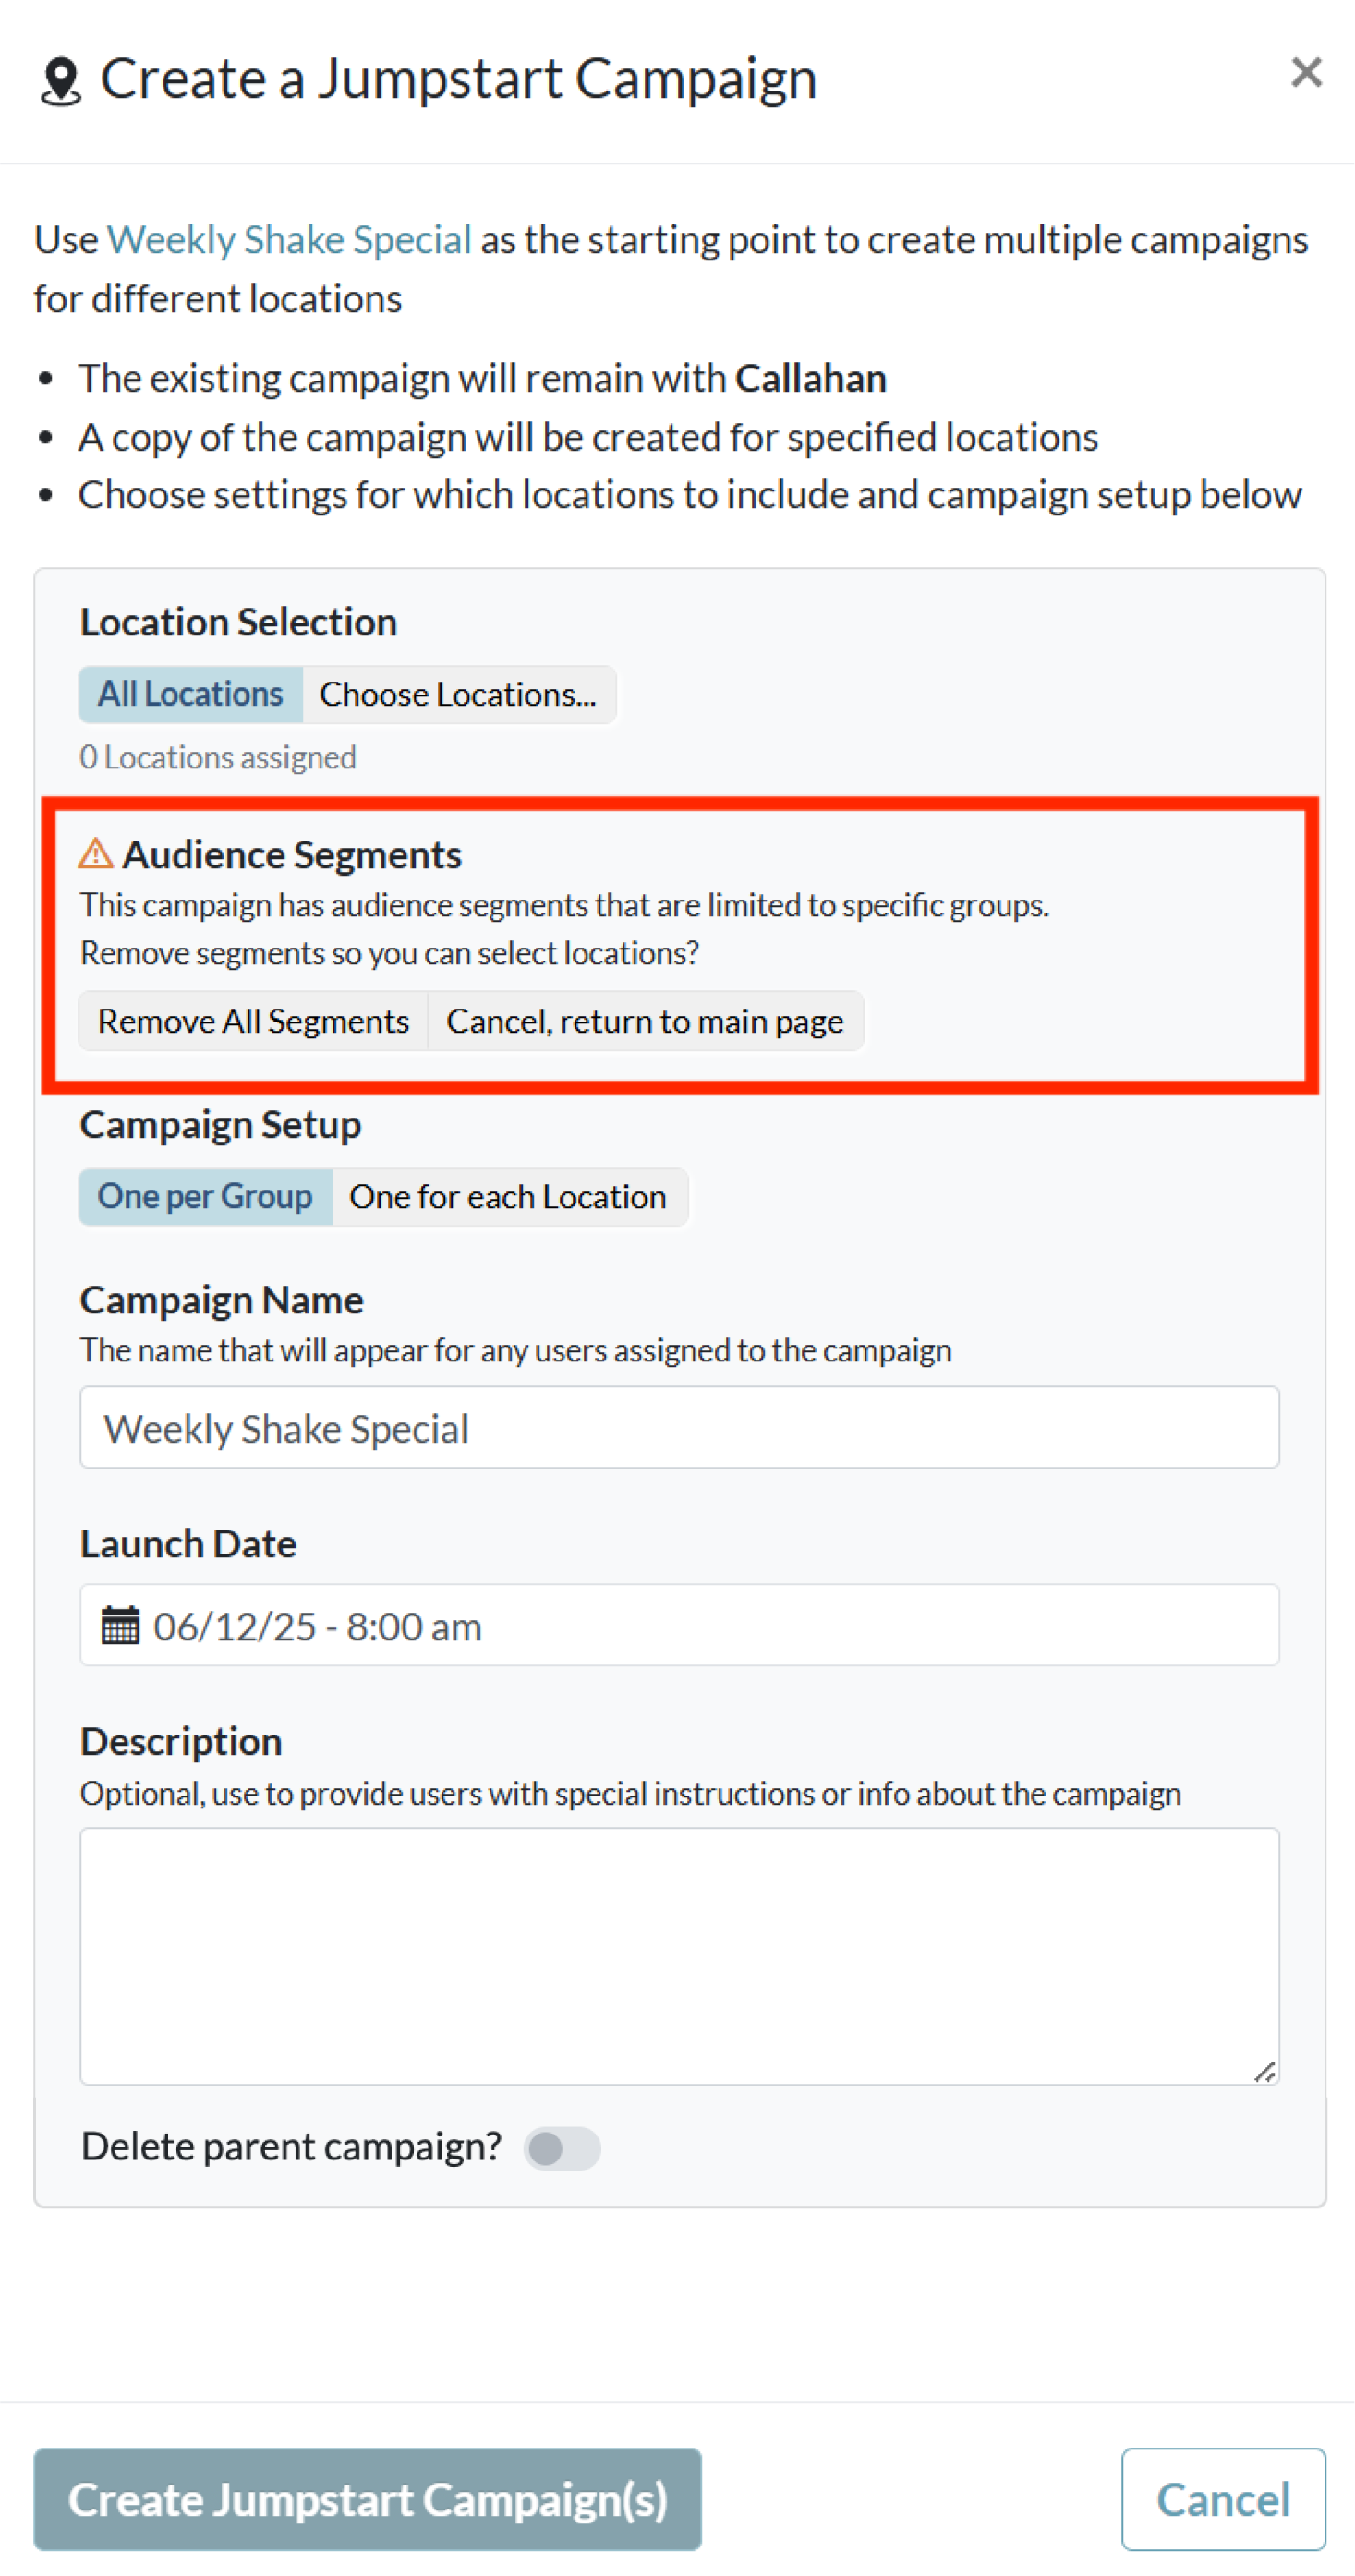
- Campaigns with audience segments:
- If the campaign you created has audience segments that are limited to specific groups. You will have to click Remove All Segments before creating the Jumpstart Campaign.
-
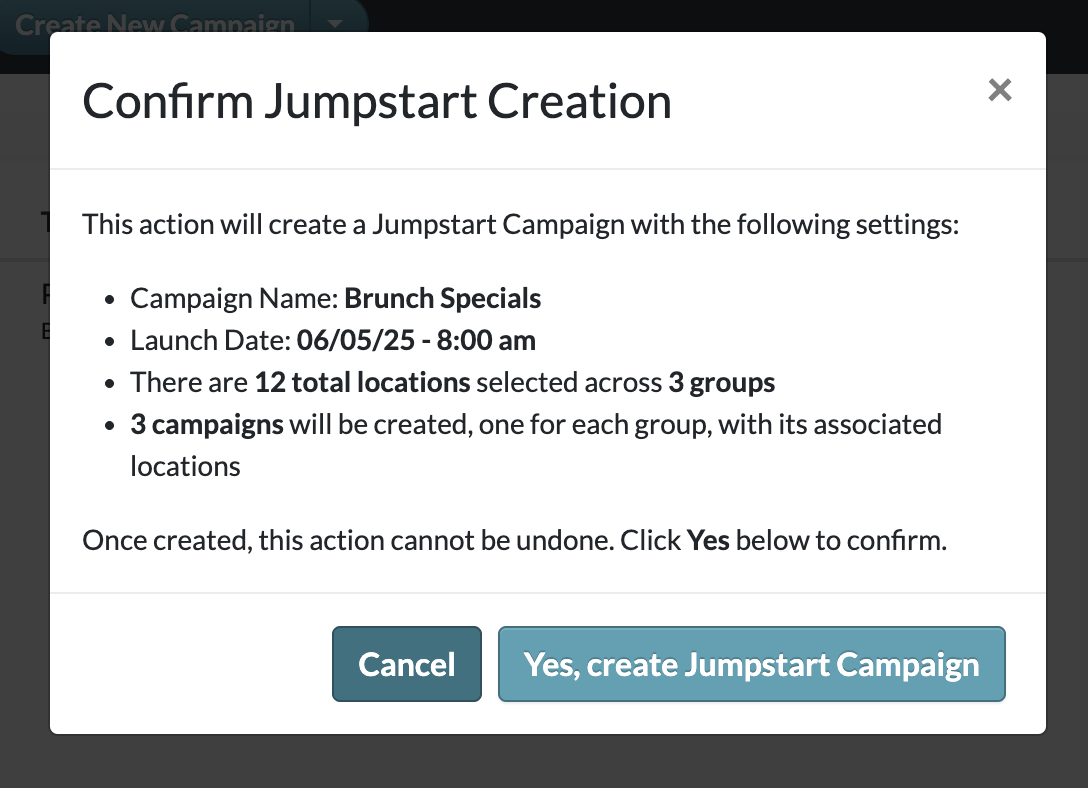
Jumpstart Campaign - Audience Segments Restriction When settings are finished, click Create Jumpstart Campaign(s).
In the Confirm Jumpstart Creation popup, verify that all of your information is correct. Then, click Yes, create Jumpstart Campaign.
- Restricted templates:
-
Confirm Jumpstart Creation
-


Recalling a Jumpstart Campaign
Approvers can recall Jumpstart Campaigns that have been pushed out to users. This provides additional flexibility in managing Jumpstart Campaigns, allowing approvers to fix mistakes or adjust a campaign.
- In the Campaigns Overview page, find one of the Jumpstart Campaigns that you would like to recall. Click on the icon with three vertical dots. Select Recall Jumpstart...
-
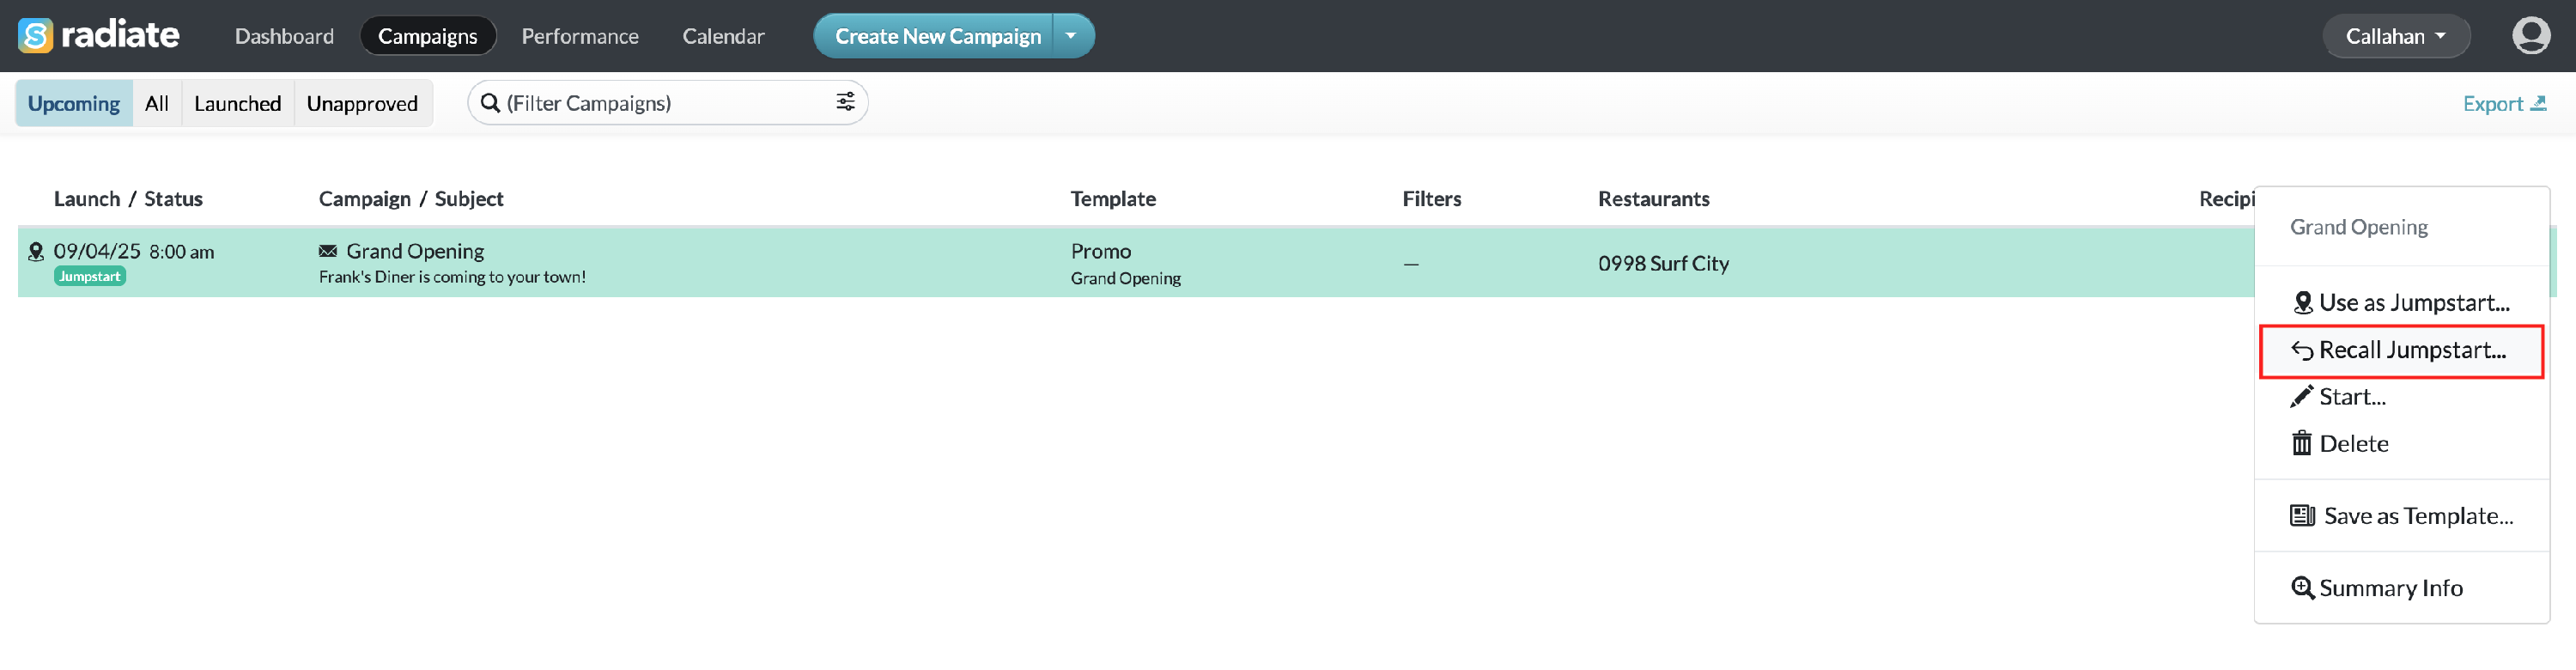
Jumpstart Campaign - Recall
-
- Options include recalling non-started campaigns or all campaigns. Campaigns that are currently scheduled will not be recalled.
-
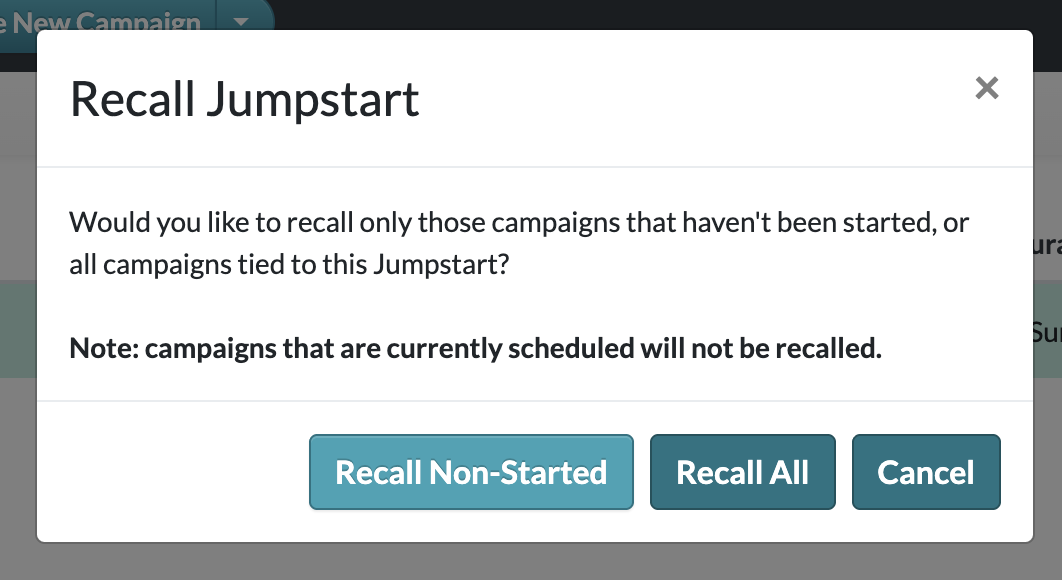
Recall Jumpstart
-


What Users Will See
Campaigns
A copy of the campaign will appear in the selected locations' Campaign tabs.
Jumpstart Campaigns will be pinned to the top of the list, highlighted in green with a icon to the left side.

When users open the campaign, they see a blue information box. This will explain which user created this Jumpstart Campaign and include the description.
Users can personalize, edit, and submit or schedule the campaign.

Calendar
On the Calendar tab, users will see Jumpstart Campaigns with the jumpstart icon.
Hovering over the campaign name will show the description.

Click on Filters, to exclude Jumpstart Campaigns from the Calendar.
