Blackout Dates
Administrators can use Blackout Dates to set which dates Users cannot send campaigns on.
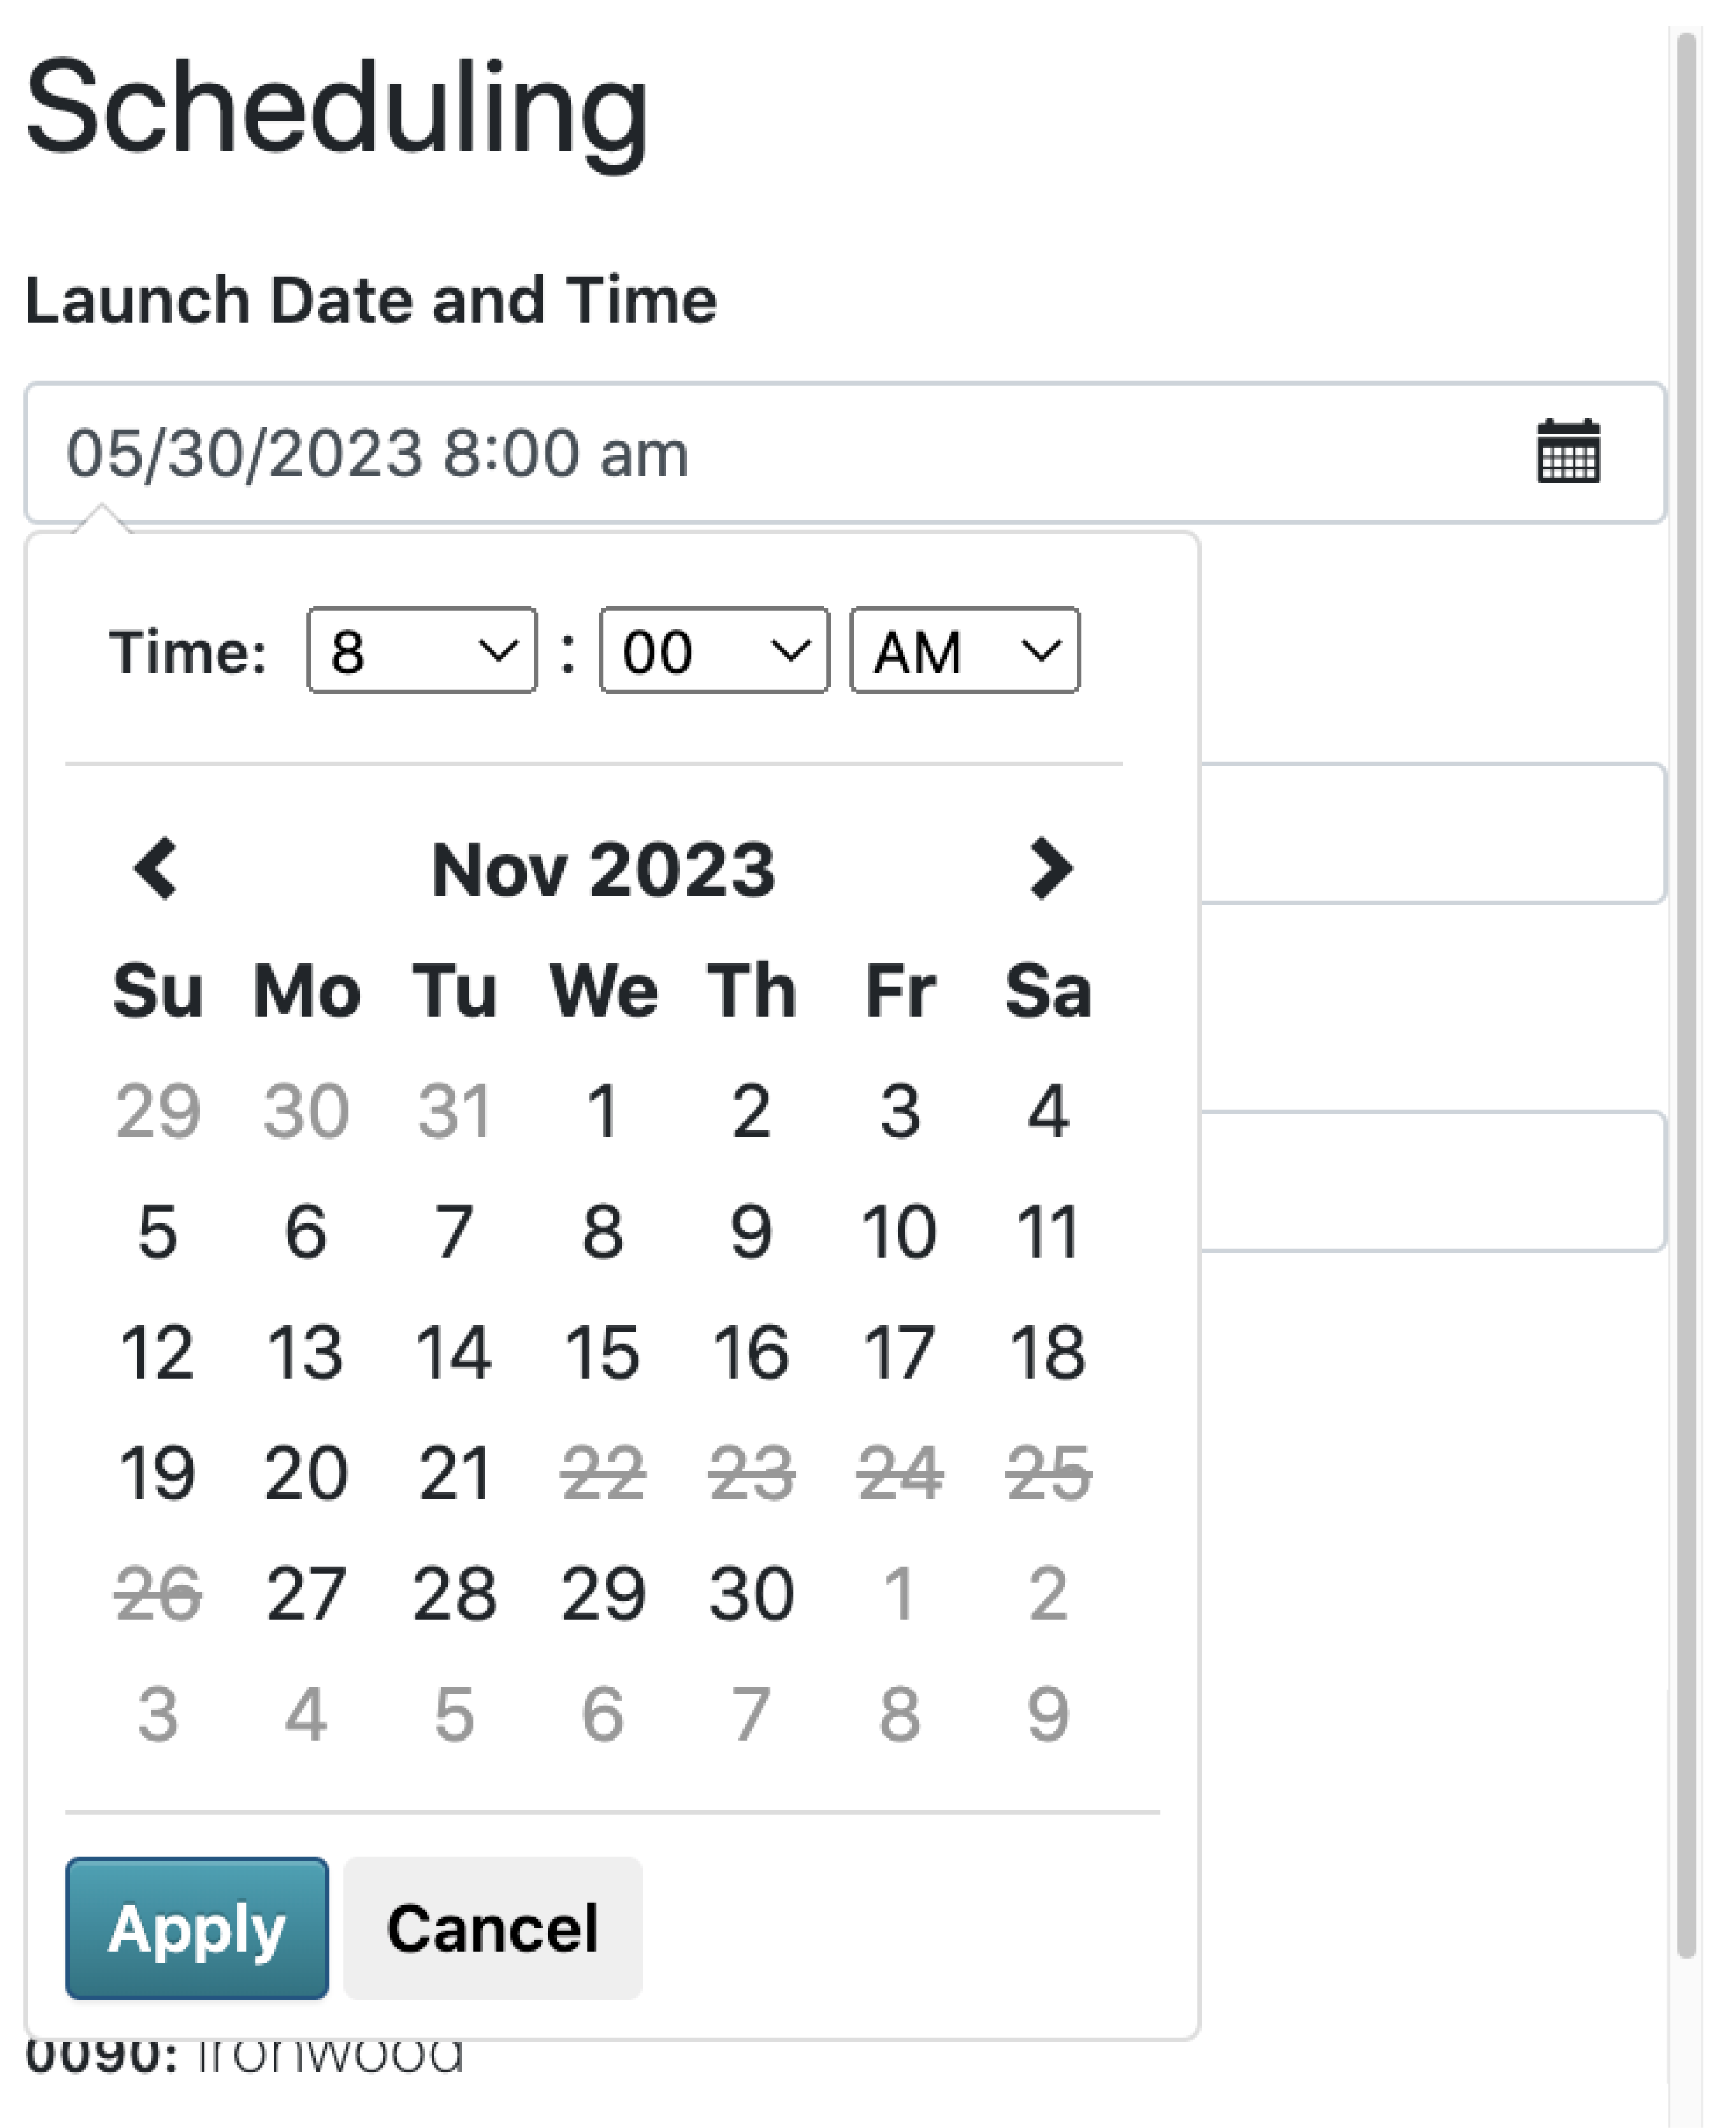
Users will be able to see these dates on the Radiate Calendar. Blackout Dates will also be greyed out and unavailable for selection when a User is scheduling a campaign.
This feature is available for users with the Administrator role and for accounts with the Blackout Dates module enabled.
In this article
Blackout Dates Page
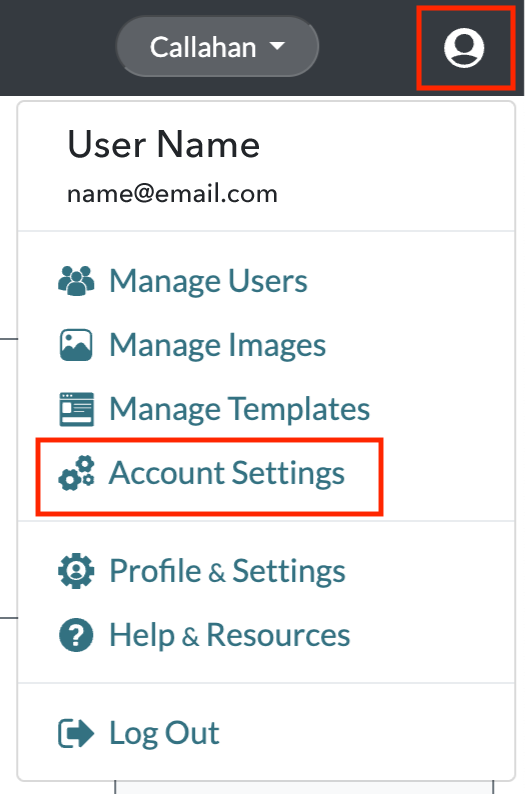
Click on the User Options menu in the top right of the Radiate screen and select Account Settings from the dropdown menu.
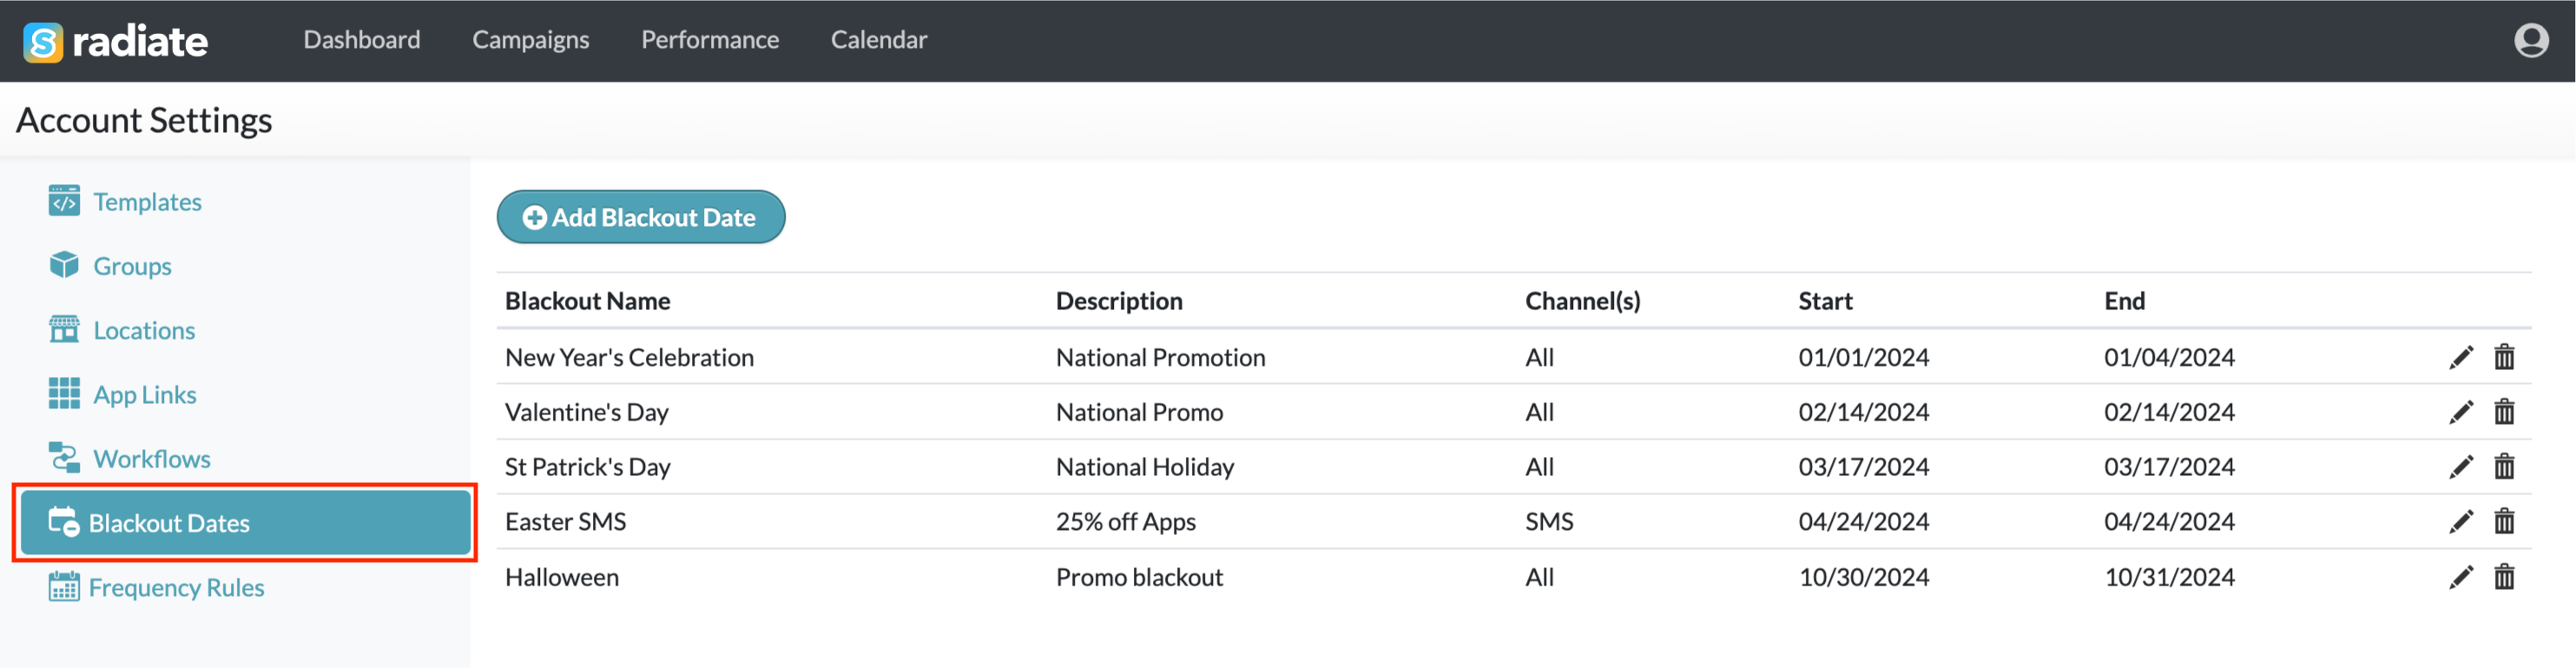
From the Account Settings page, click on the Blackout Dates tab.
Add New Blackout Date
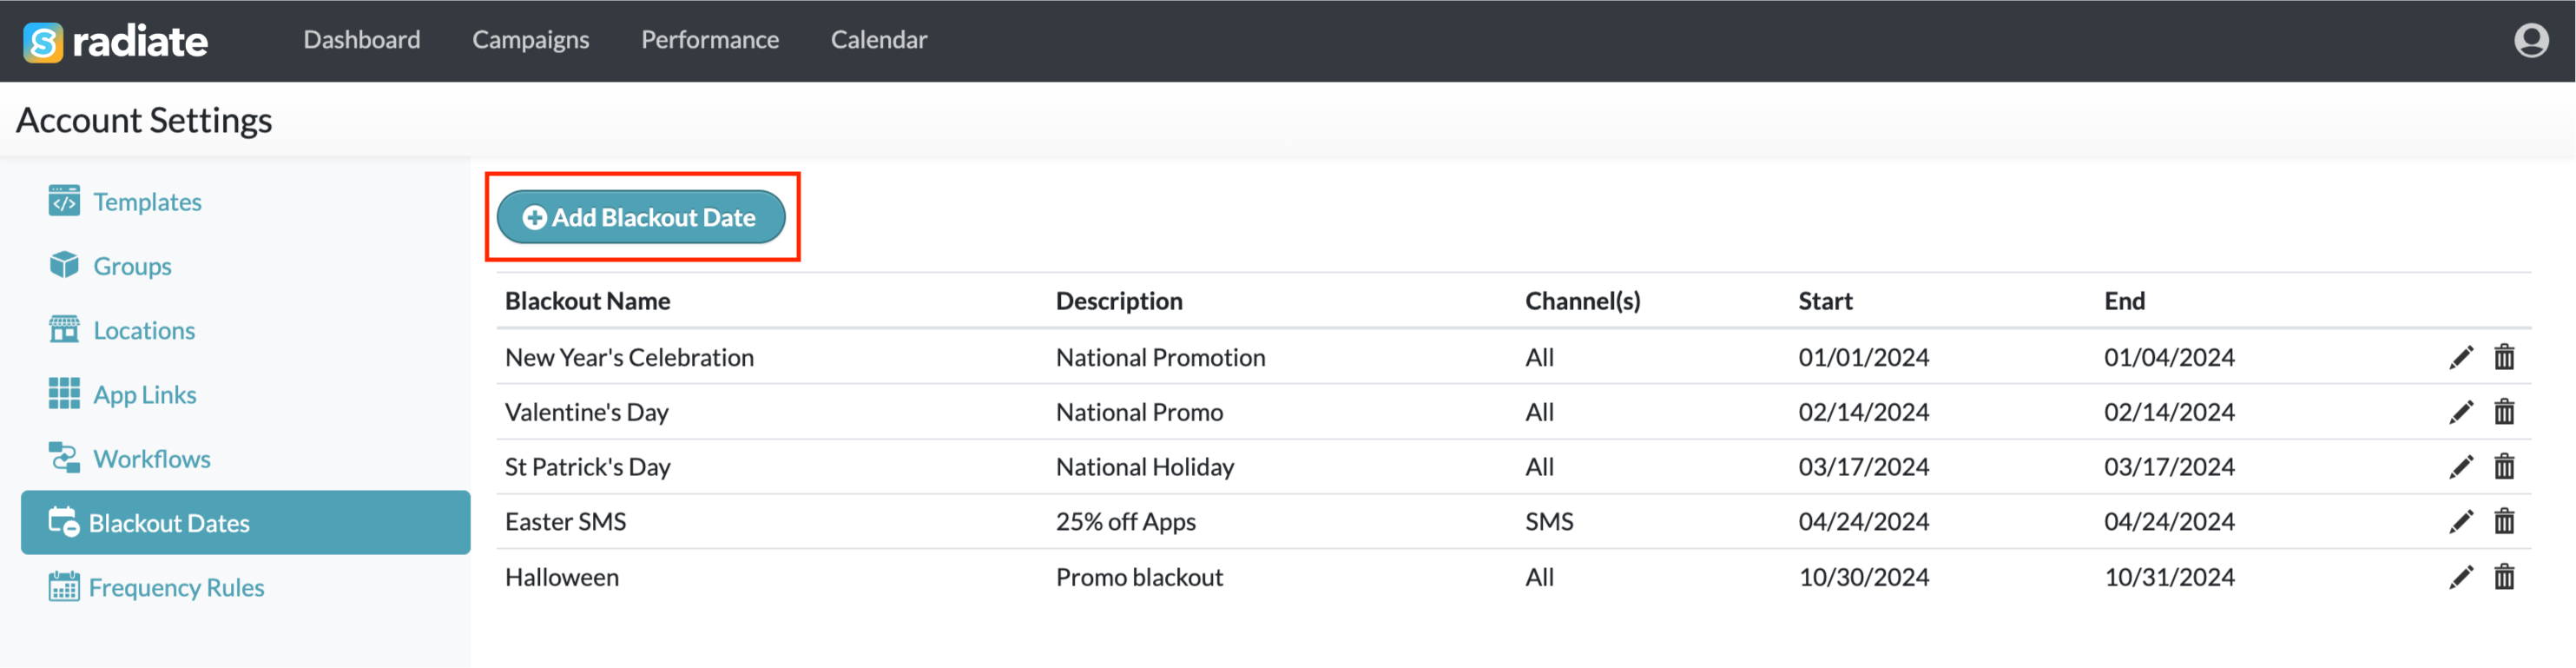
Click the blue Add New Blackout Date button in the main menu at the top of the page.
In the Add Blackout Date(s) window, enter the Blackout Name, Description, Start Date, and End Date. Enter the dates in mm/dd/yyyy format. Enter the same date in the Start Date and End Date fields if the Blackout period is only one day long.
Check that all the information entered is correct and click Save Changes.

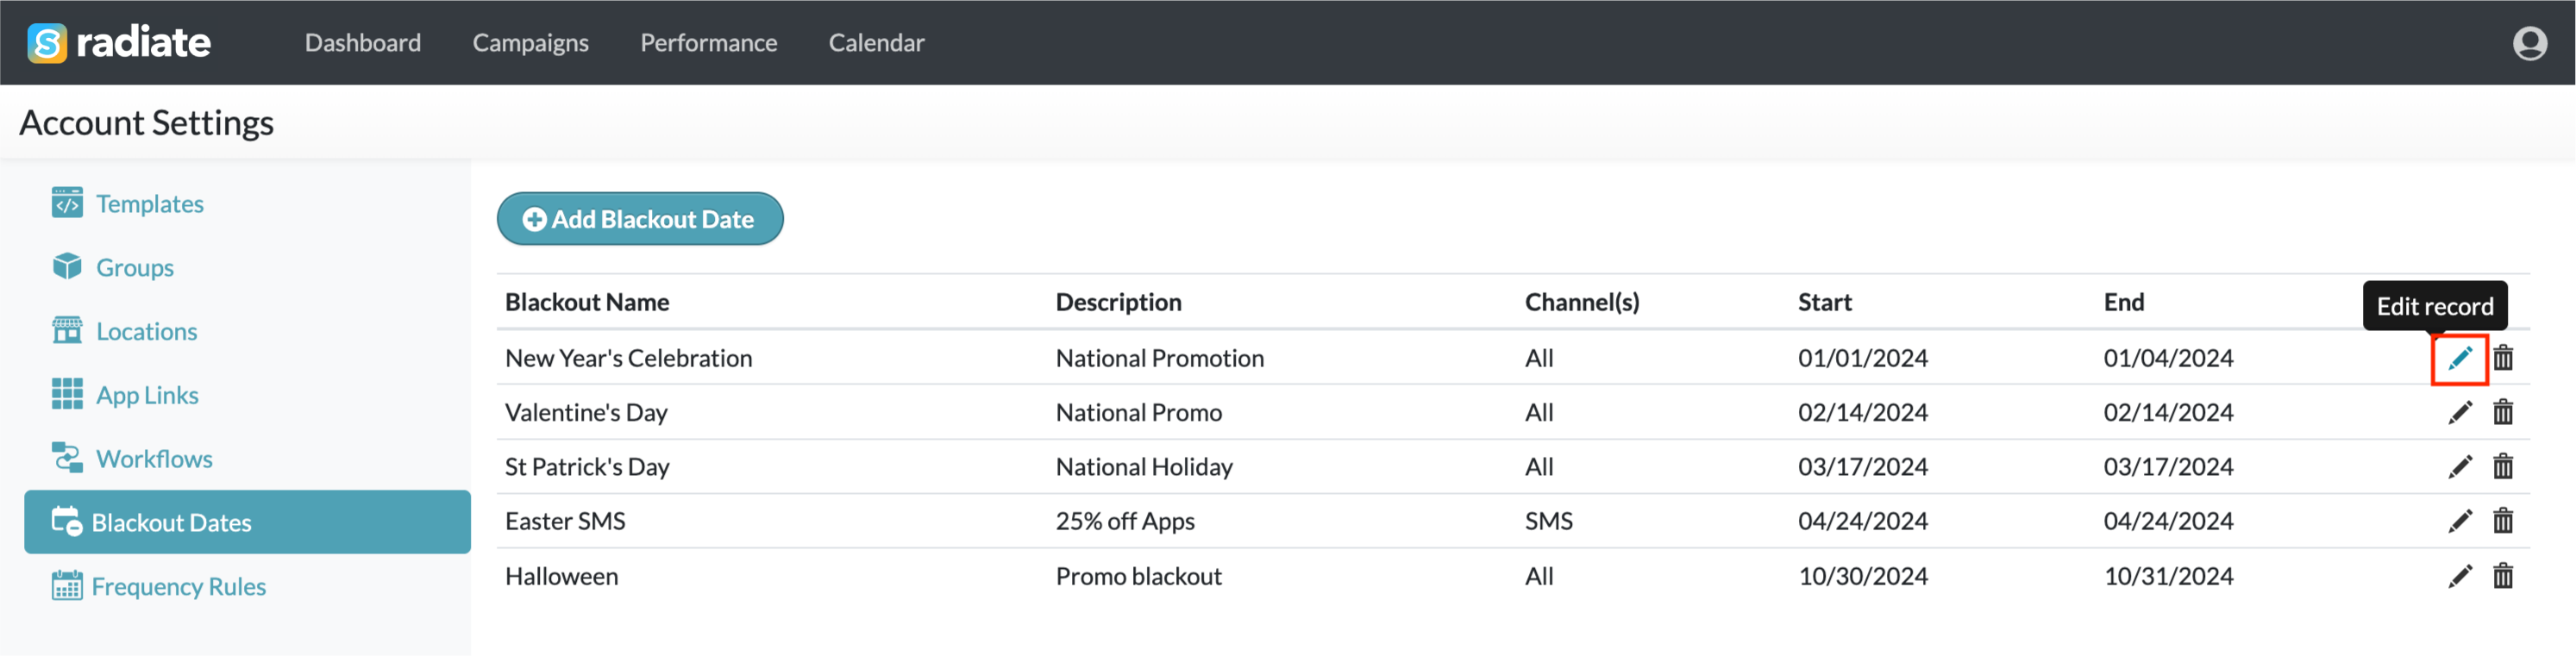
Edit Blackout Date
To edit an existing Blackout Date, click the pencil icon on the right of the row you wish to edit.
In the Edit Blackout Date(s) window, make any changes and click Save Changes.

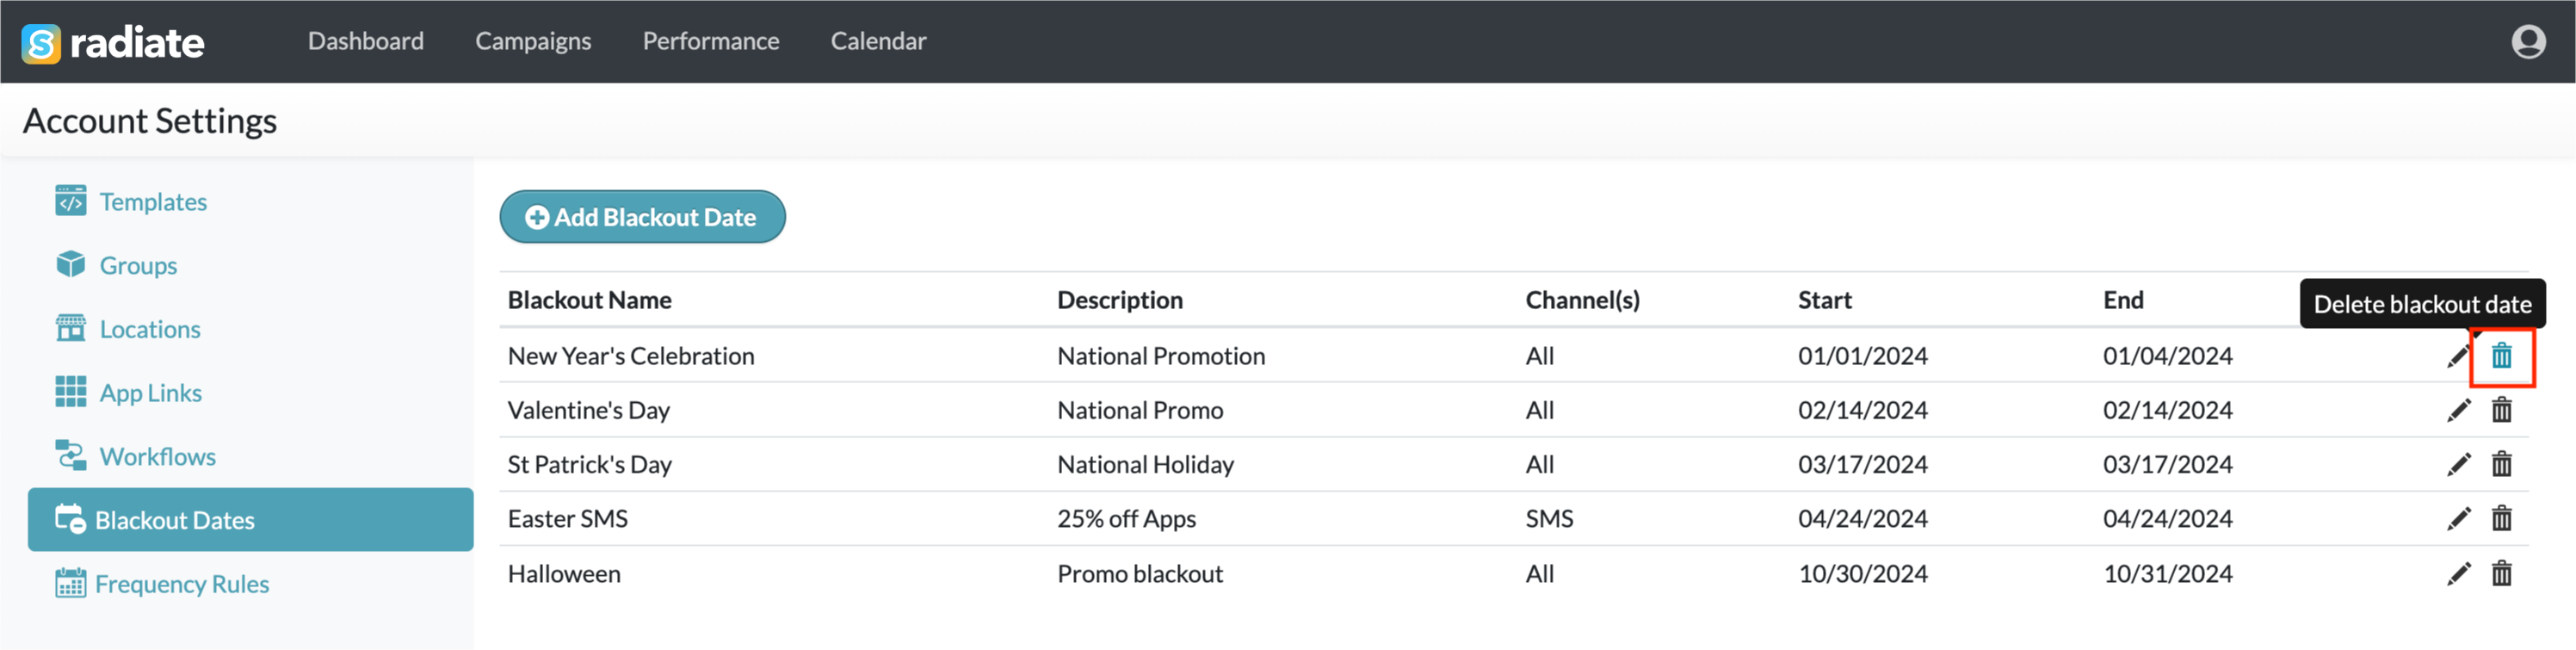
Delete Blackout Date
To delete an existing Blackout Date, click the trashcan icon on the right of the row you wish to edit.
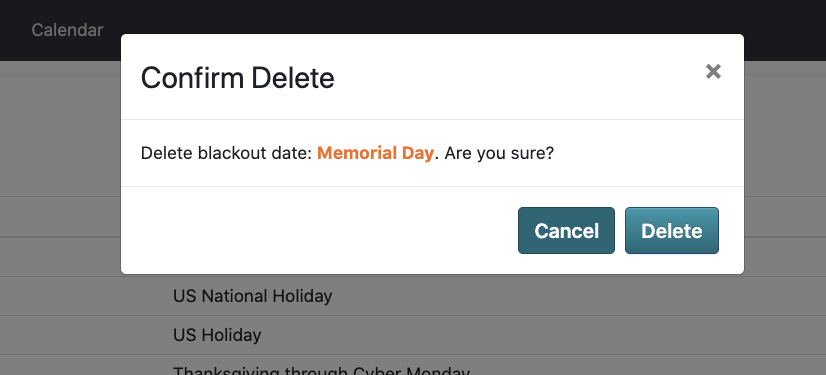
In the Confirm Delete pop-up window, click the Delete button.
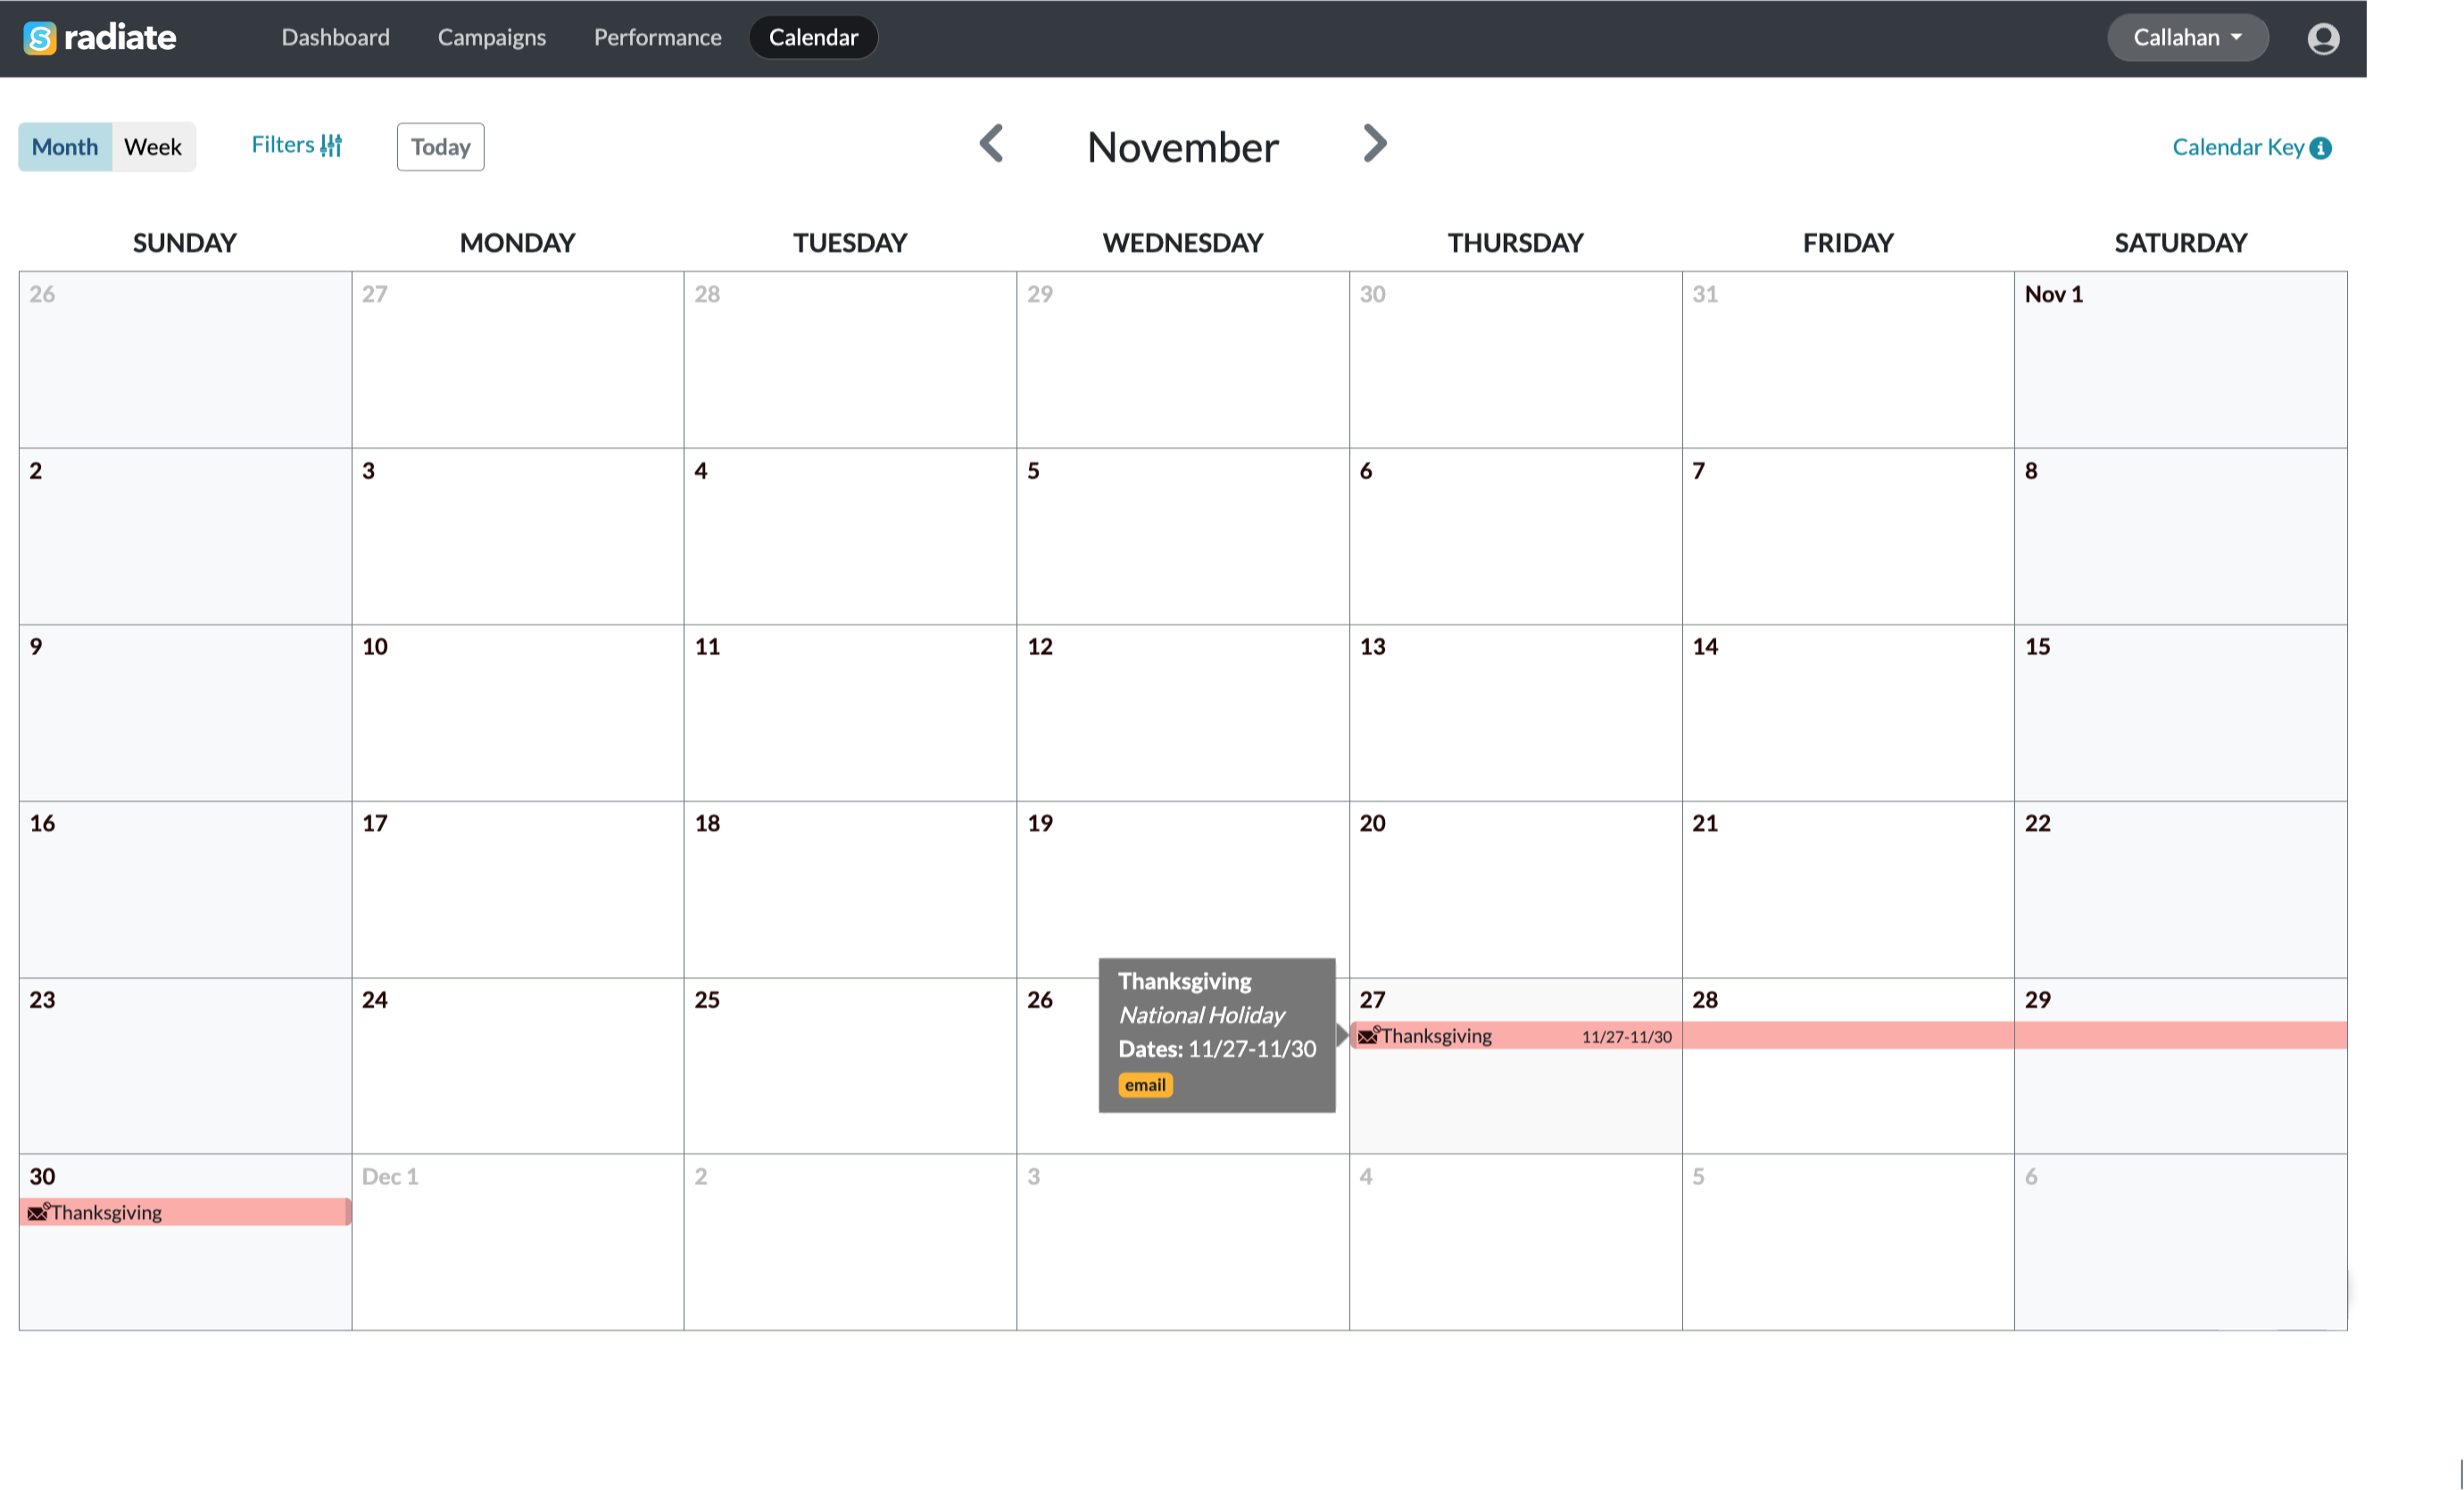
View Blackout Dates
In addition to viewing the full list of Blackout Dates on the Blackout Date page, you can also view the dates in the Calendar view.
The Blackout Dates will also be greyed out and unavailable for selection when a User is scheduling a campaign.