Delete or Disable a Group
Groups are managed by Administrators through the Radiate application. If Groups are not synced with an external database for your account, any changes to Groups must be managed separately in Radiate.
This feature is available for users with the Administrator role.
In this article
Disabling a Group
We recommend you disable a Group rather than delete it. Deleting a Group will remove any history for that Group.
To easily identify Groups you may want to disable:
- Click on the User Options menu in the top right of the Radiate screen and select Account Settings from the dropdown menu.
-
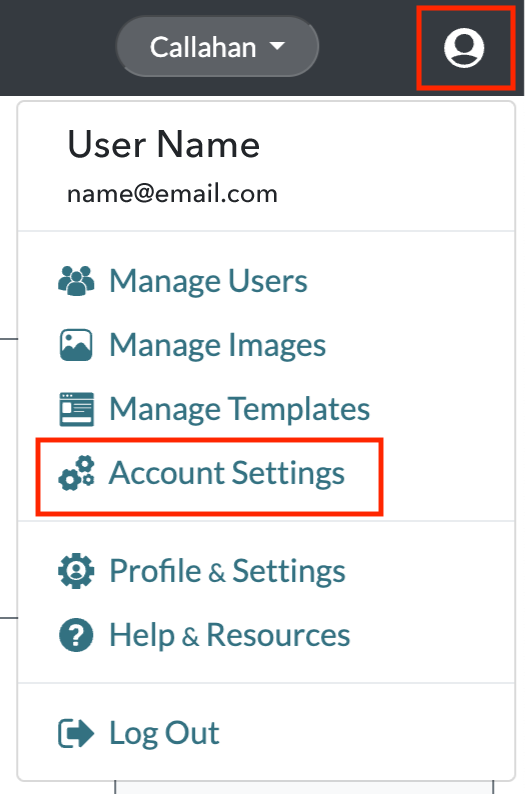
User Options - Account Setting
-
- Go to the Groups tab and sort by the Location column from lowest to highest number of locations.
-

Account Settings - Groups
-
- Review the locations with the red "No Locations" badge and determine which you may want to disable.


To disable a Group:
- Click on the User Options menu in the top right of the Radiate screen and select Account Settings from the dropdown menu.
-
Account Settings
-
- From the Account Settings page, click on the Locations tab.
-

Account Settings - Locations - Enter the Group name in the search bar to see all of the locations tied to that Group. Make sure those locations are disabled or reassigned to an active Group.
-
- Next, go to the Groups tab.
- Search for the Group and click on the pencil icon to edit it.
-

Account Settings - Groups
-
- Change the Active toggle to "No".
-

Edit Group - Inactive
-
- Save.
- Search for the Group and click on the pencil icon to edit it.
- From the User Options menu, select Manage Users.
-

User Options - Manage Users - Enter the Group name in the search bar to see all the users tied to that Group.
-

Manage Users
-
- Make sure those users are disabled or reassigned to an active Group.
-


Deleting a Group
The only time we recommend deleting a Group is if you have just added them and need to remove the Group before any locations or users have been assigned to it.
If you would like to delete a Group:
- Click on the User Options menu in the top right of the Radiate screen and select Manage Users. You must do this step first as once you delete the Group, the Group is also deleted from the user record.
-
User Options - Manage Users - Enter the Group name in the search bar to see all the users tied to that Group
-
Manage Users - Make sure those users are disabled or reassigned to an active Group.
-
- Click on the User Options menu in the top right of the Radiate screen and select Account Settings from the dropdown menu.
-
Account Settings
-
- From the Account Settings page, click on the Locations tab.
-
Account Settings - Locations Enter the Group name in the search bar to see all of the locations tied to that Group,
- Make sure those locations are disabled or reassigned to an active Group.
-
- Next, go to the Groups tab.
- Search for the Group and click on the trash can icon to delete it.
- In the Confirm Delete popup window, click Delete.
-

Manage Groups - Delete Group
-
- Search for the Group and click on the trash can icon to delete it.
